Last Update: Jan 15, 2015 - updated my initial timing.
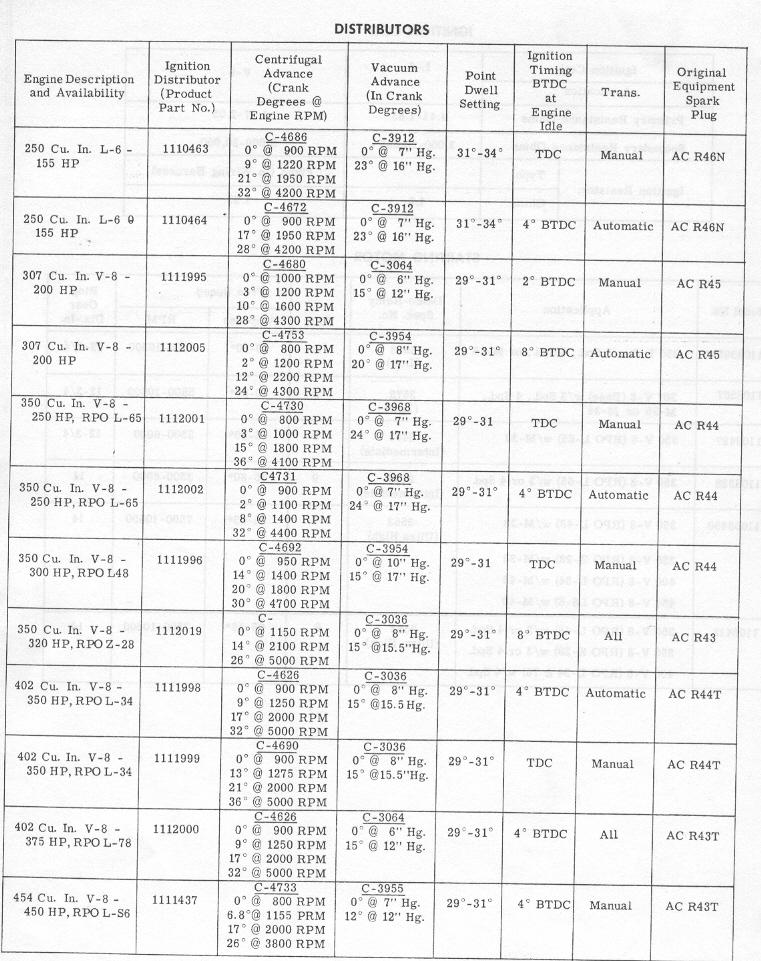
The distributor is set with stock springs and timed at 16 degrees initial and 36 degrees total advance @ 4000 rpm (vacuum disconnected).
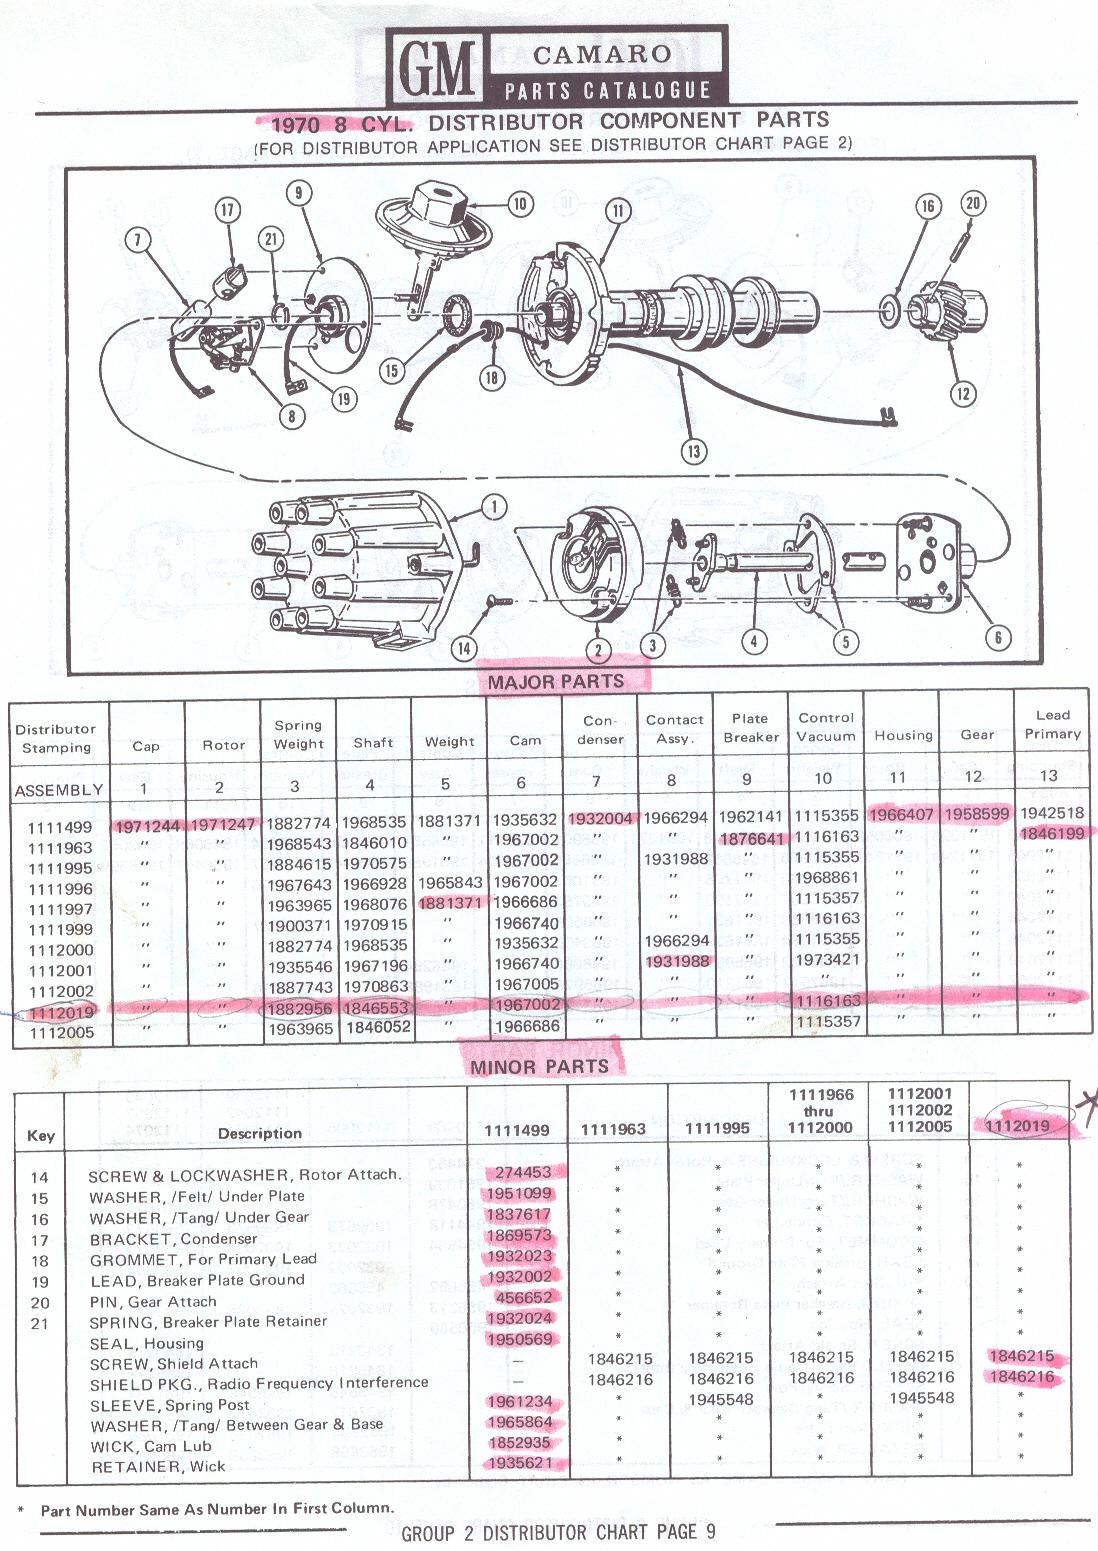
Distributor - 1112019
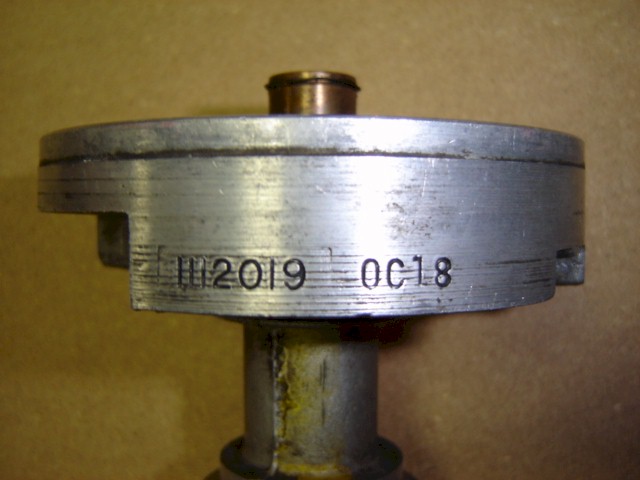
Date Code 0C18
0=1970
C=March
18=18th day of March
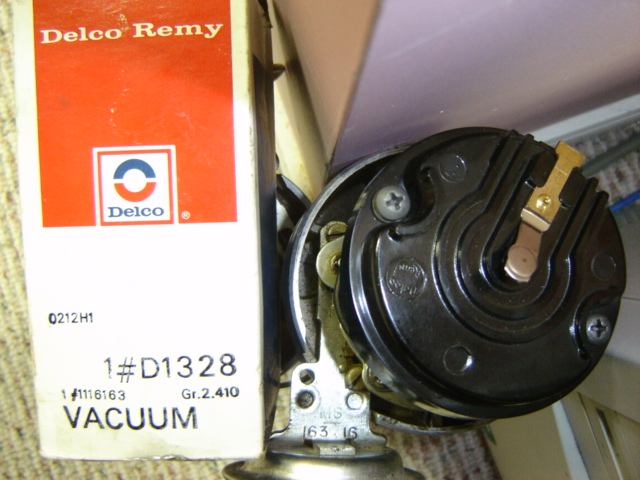
Dist Vacuum and Cam Info
There is no Part No. that ends in 201 for the MS 201 15 vacuum advance in the GM Camaro Parts Catalogue for the 70 Z28.
So I assume this part was assembled with the distributor when new on the dist line then when someone needed a replacement
they ordered 1116163 from GM Parts. Therefore both 201 15 and 163 16 are correct for the 70 Z28. I still have my worn 201 15
that I replaced along with the dist cam in '85. So in I purchased part # 1116163.
Note: The 1st 2 digits MS is the original manufacturer for the vacuum unit. The first 3 numbers refer to the last 3 numbers of the Delco
part number. The final 2 digits represent the number of crankshaft degrees of advance built into the vacuum unit.
Vacuum Part # 1116163 stamped as MS 163 16
CAM Part # 1967002 Stamped as 530 CCW
My old parts from the orig owner that I replaced were ( I still have them) are MS 201 15 and the CAM was Part # 1967002 stamped 530 CCW
I had a broken spring post so I had to take one off the worn 530 CCW and tack it.

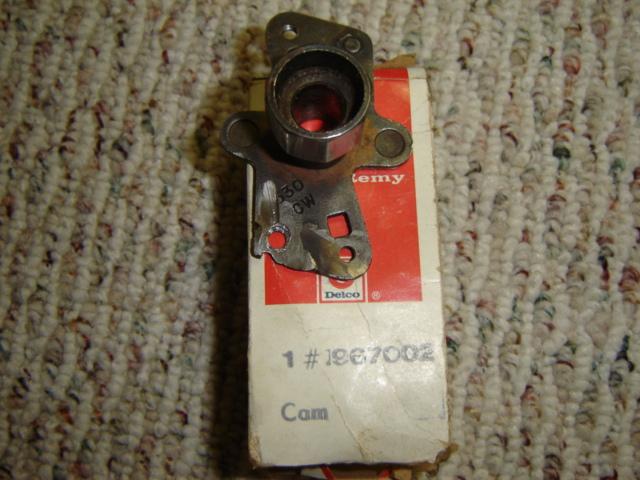

Orig 201 15 Orig 530 CCW New 530 CCW New 163 16 vacuum

Using Crane XR-i rather than points. This one has a rev limiter.
Before this I had a Pertronix and it lasted for many years but due to engine heat it died.
It dies slowly, it would give me symptoms like I needed to adjust my carb.

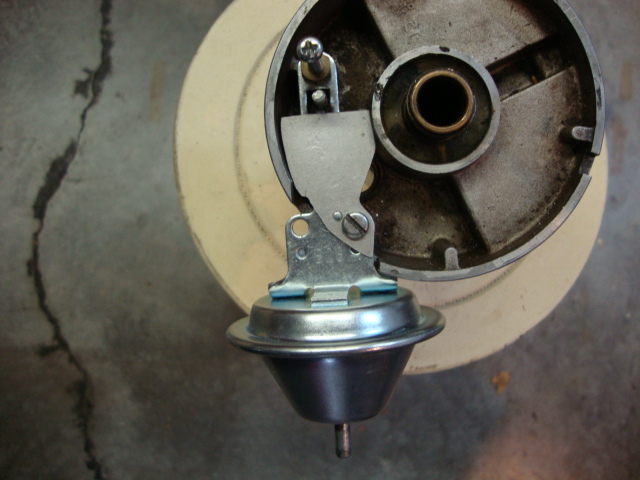
Distributor No Distributor Parts
Engine/Distributor
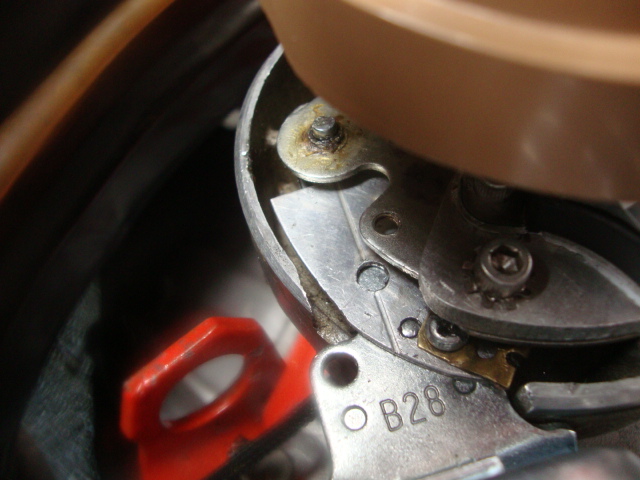
B28 Vacuum Advance Can

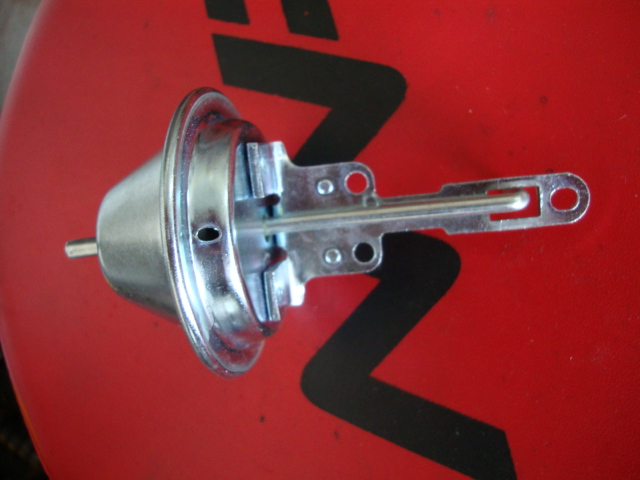
If you have a different cam and it's only producing around 10" of vacuum with the VA (vacuum advance)
can connected, Then you can swap out the stock one with a B28 VA can. The B28 starts to work at 3-5"
of vacuum and gives you 8* max of VA at 5.75-8". If your timing at idle shoots to the high 20's or low 30's
then you need to make or buy a VA limiter stop plate. You need to achieve 20*-23* of timing at idle with
vacuum can connected.
If yours shoots to the 30's then your engine rpm's will be going up and down and making your
spark plugs black. My initial timing with VA plugged is 16* and 36* total. With my B28 connected
with a limiter plate and plastic bushing it's producing 24* at idle.
Edit: Mines still too high at idle, I've got to make a longer limiter plate. Looks like the plastic
bushing is wearing a spot, so I won't use the bushing this time.
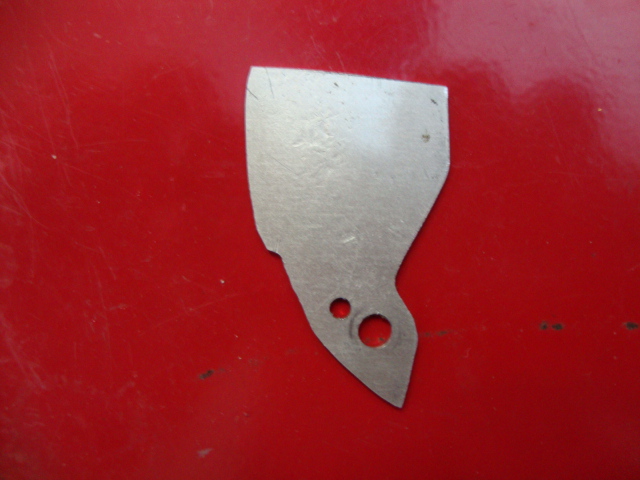
Making a limiter stop plate
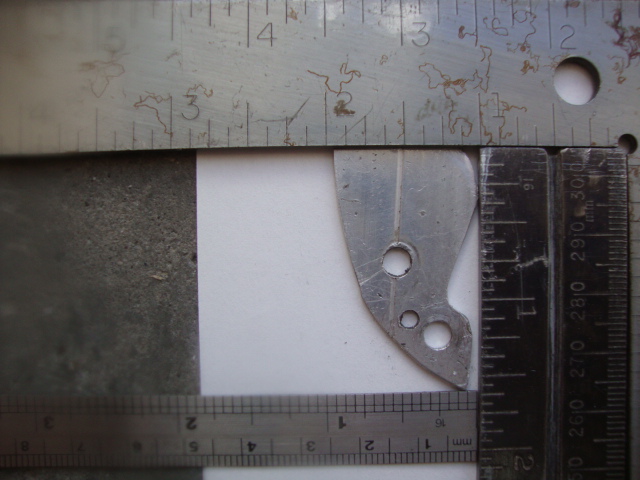
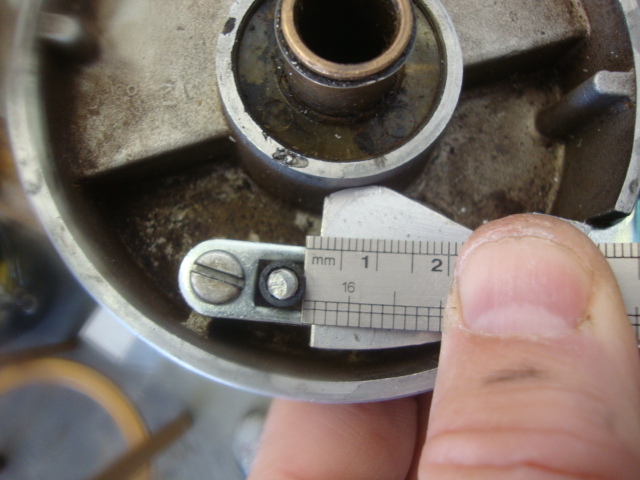
Using a piece of 18 GA scrap piece of aluminum you can cut shape the limiter with a hack saw, grinder
and a file for burs. Use 3/16" drill for the mounting screw that's used today on your can, and use a 1/8"
drill bit for clearing the nipple to sit into so the plate doesn't move around. Note the center hole in mine
was already in my scrap piece of aluminum used for a rivet which I removed. So don't drill there.
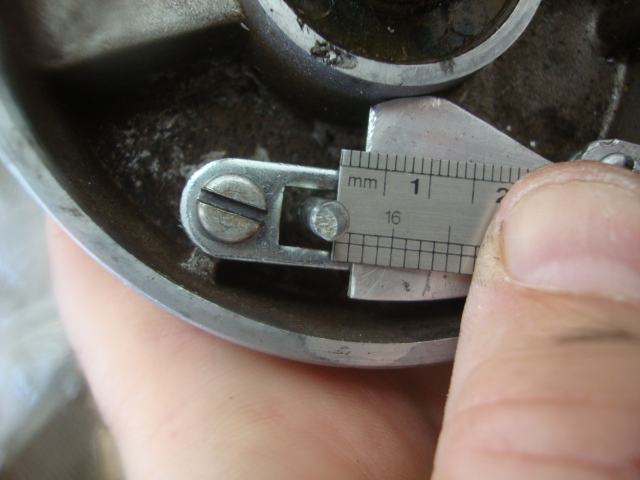
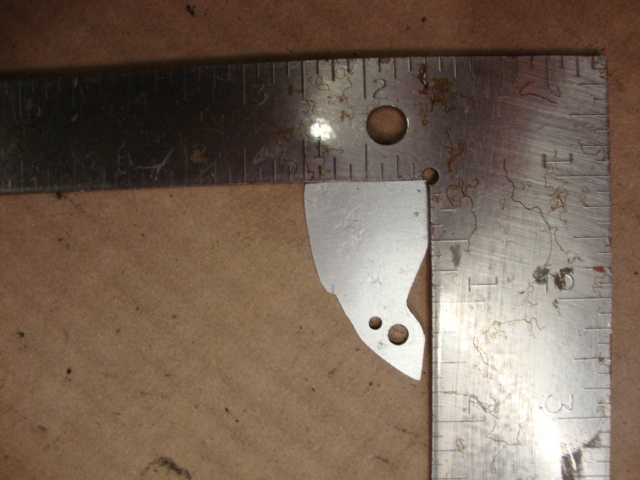
3/32" gave me 10* more timing at idle without the black bushing in the rod.
With it installed in my old dist housing without a bushing it's 3/32" movement which created 10* of advance with the
VA can plugged in. This gave me 26* at idle. I wanted to get closer to 23*. So I added a bushing like GM did. My
orig was cracked so I used a piece of RG 62A coax and removed the copper strands and pulled the center plastic
piece out so I was only left with the outer insulation. I cut it to 5/16" long and added it to the VA can vertical arm and
it limited an additional 2*at idle. Therefore I was sitting at 24* initial at idle with the VA can connected. So it gave
me 8*.
With added plastic bushing and a 1/16" movement which = 8*.
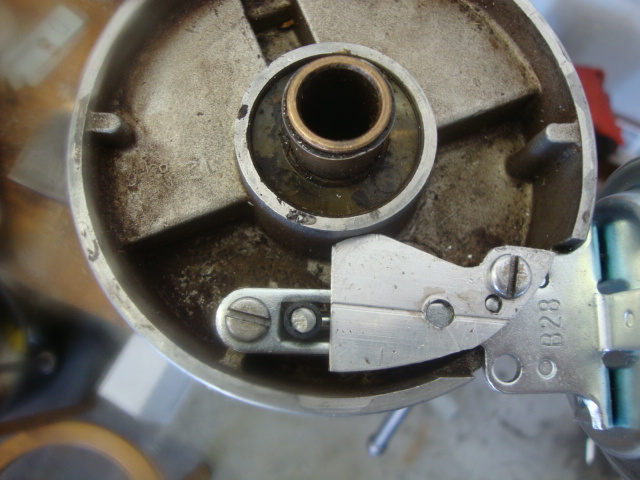
Installed

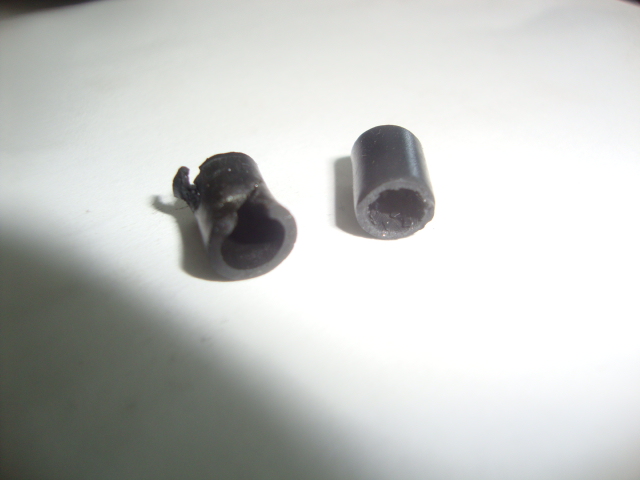

A bushing was made from RG 62A coax cable
2nd pic shows the orig bushing and the one made from coax cable.
My 2nd limited plate I made to bring in 4.5* at idle without using a plastic bush. My previous bush wore a groove
from the VA can lever hitting the limiter thus giving me more advance than I wanted which caused a bad idle.
This one gives me 4.5* at idle without the plastic bushing on the VA rod. So now I have 16* initial without VA and 20.5*
with VA connected at idle with no bushing.